

Your first CAD
This guide takes about five minutes. By the end you’ll have a CAD saved on your computer and know what every part of the screen is for.
1. Open GearCAD
Section titled “1. Open GearCAD”Go to gearcadengine.web.app in Chrome or Edge. (Other browsers work too, but can’t save straight to files. See Browsers.)
GearCAD opens on the home screen. It lists every CAD you’ve made in this browser. The first time, it’s empty.
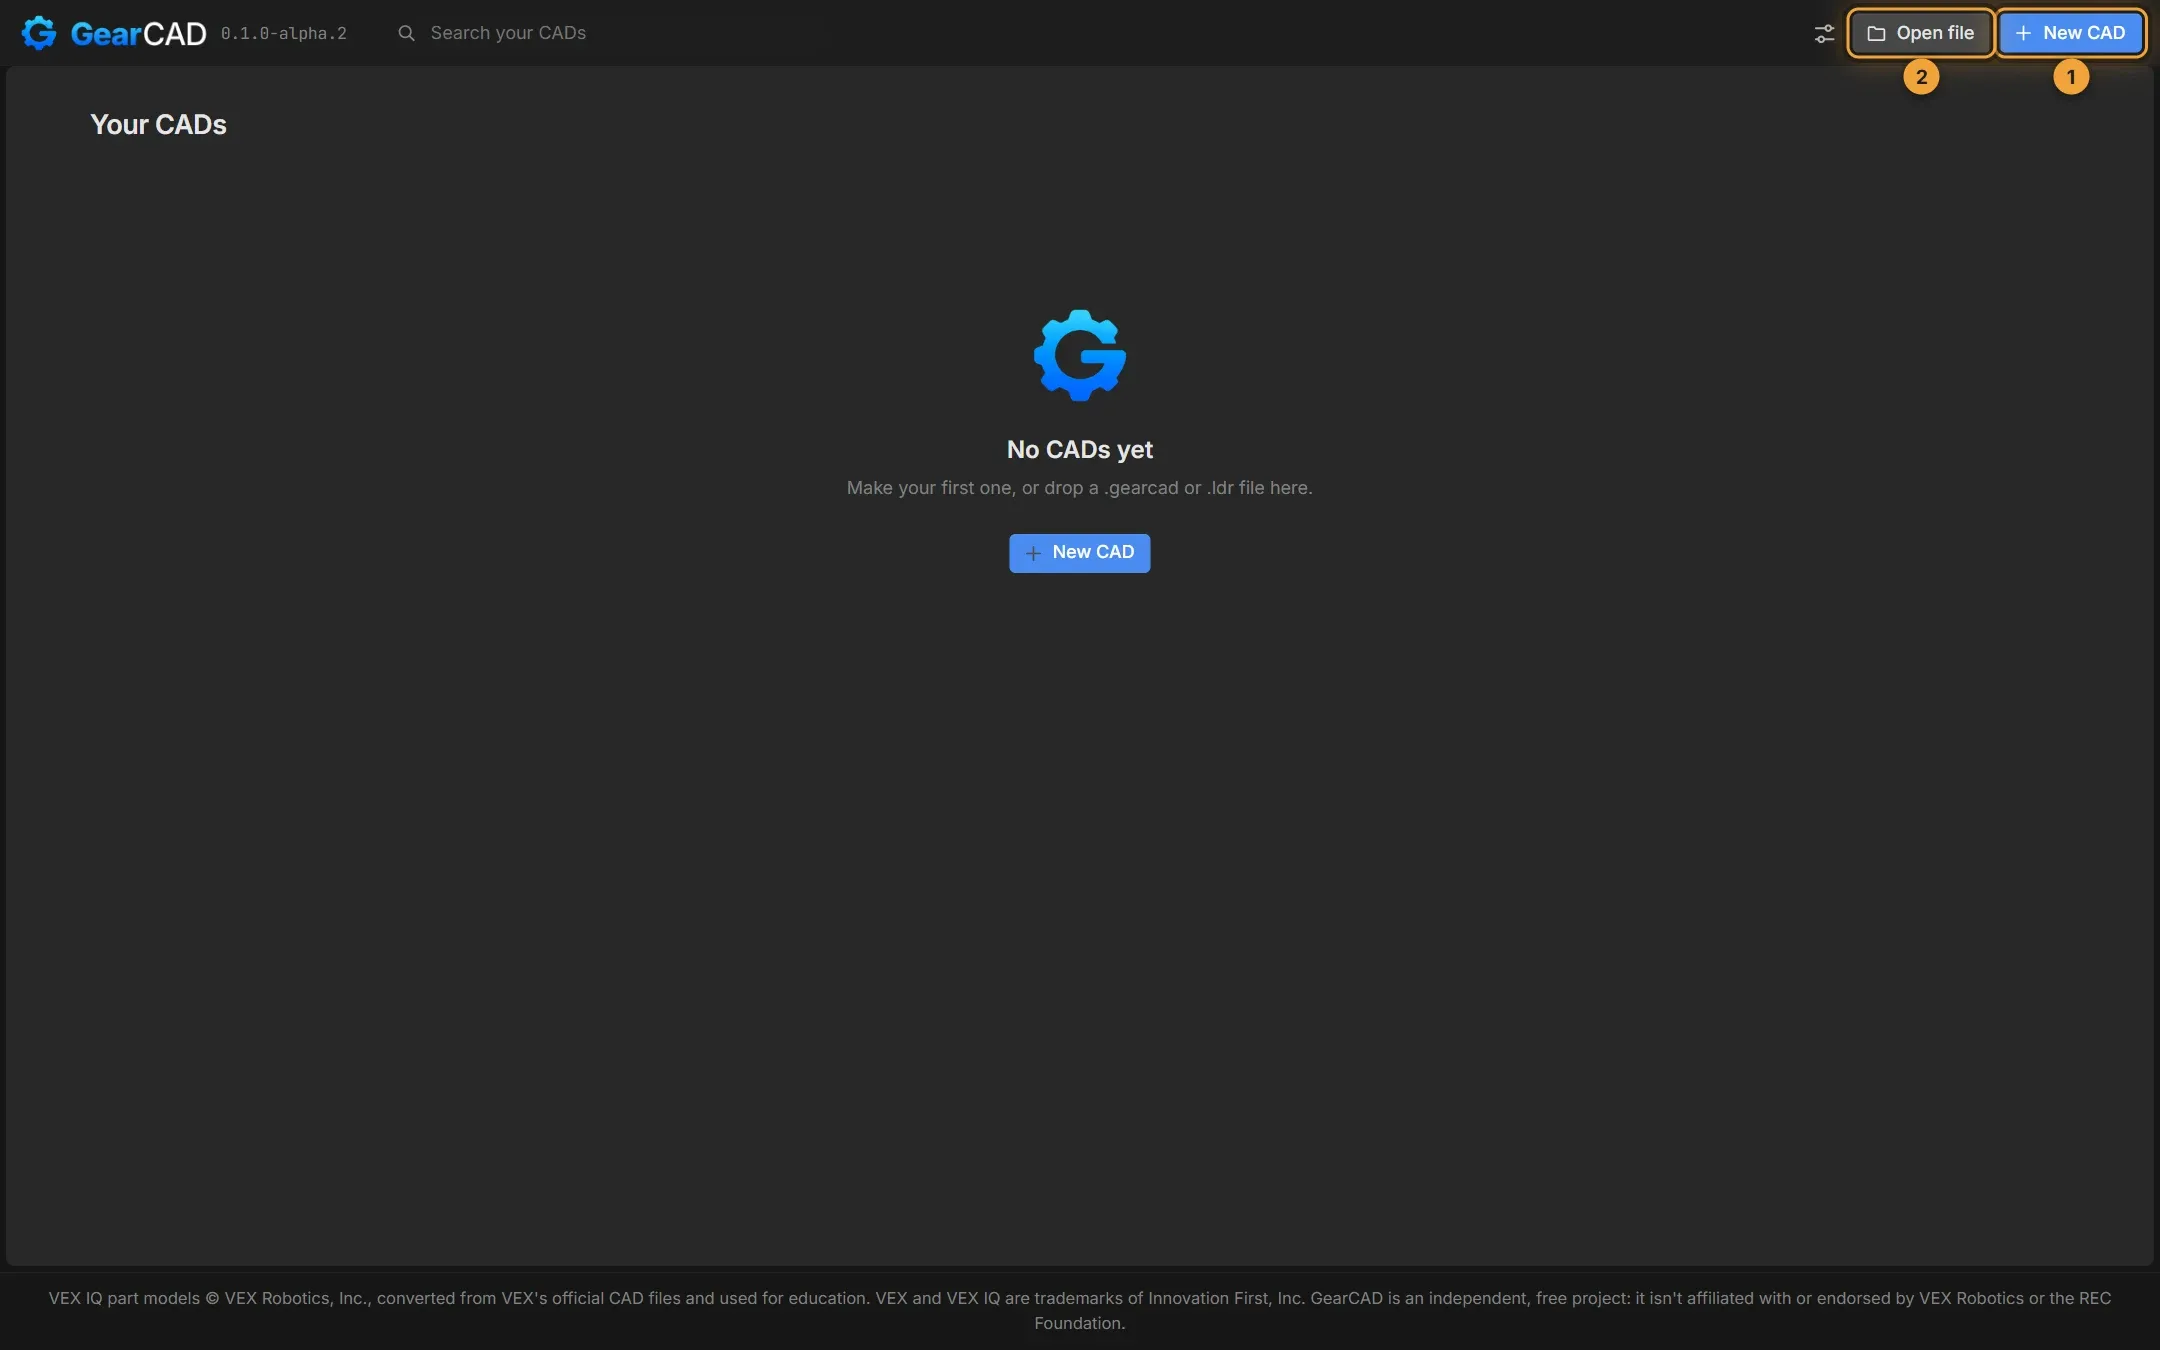
- New CAD starts a new design.
- Open file opens a
.gearcadfile someone sent you, or one you saved on another computer.
2. Set up the new CAD
Section titled “2. Set up the new CAD”Click New CAD. A window opens with a few choices.
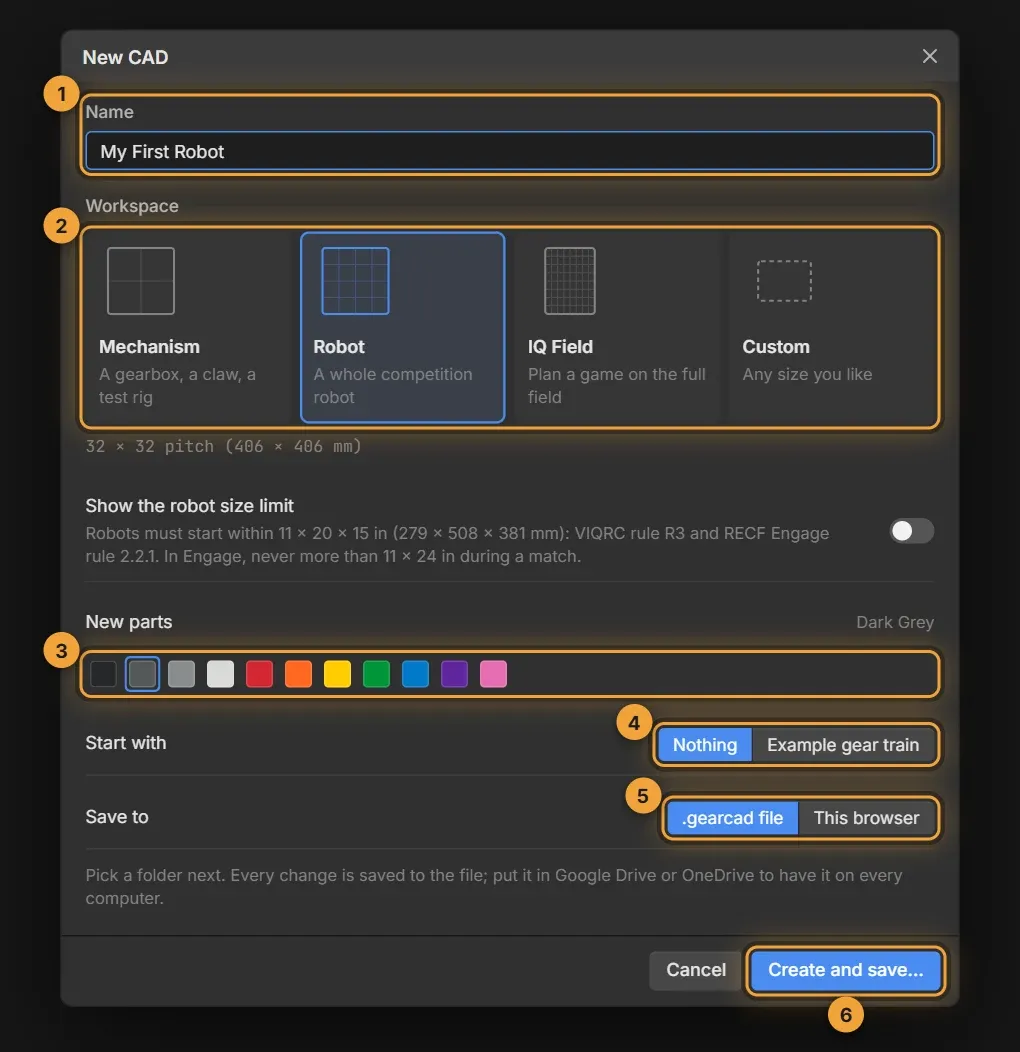
- Name. Call it something you’ll recognise later, like Claw v1 or Drivetrain test.
- Workspace. The size of the floor grid you build on.
- Mechanism (16 × 16 holes) for a gearbox, a claw or a test rig.
- Robot (32 × 32 holes) for a whole competition robot. This is the usual choice.
- IQ Field for planning on the full 6 × 8 ft field.
- Custom for any size you like.
- New parts. The colour parts start in. You can change any part’s colour later.
- Start with. Nothing gives you an empty workspace. Example gear train gives you a small finished mechanism to explore. If this is your first time, try the example.
- Save to. .gearcad file saves your CAD as a file on your computer, like a VEXcode project. This browser keeps it inside the browser only.
- Click Create and save… and pick a folder, or Create CAD if you chose This browser.
There’s also a switch for Show the robot size limit. It draws the largest size a VEX IQ robot may be at the start of a match (11 × 20 × 15 in), so you can see whether your design fits.
3. Find your way around
Section titled “3. Find your way around”This is the main screen. Each numbered area has its own job.
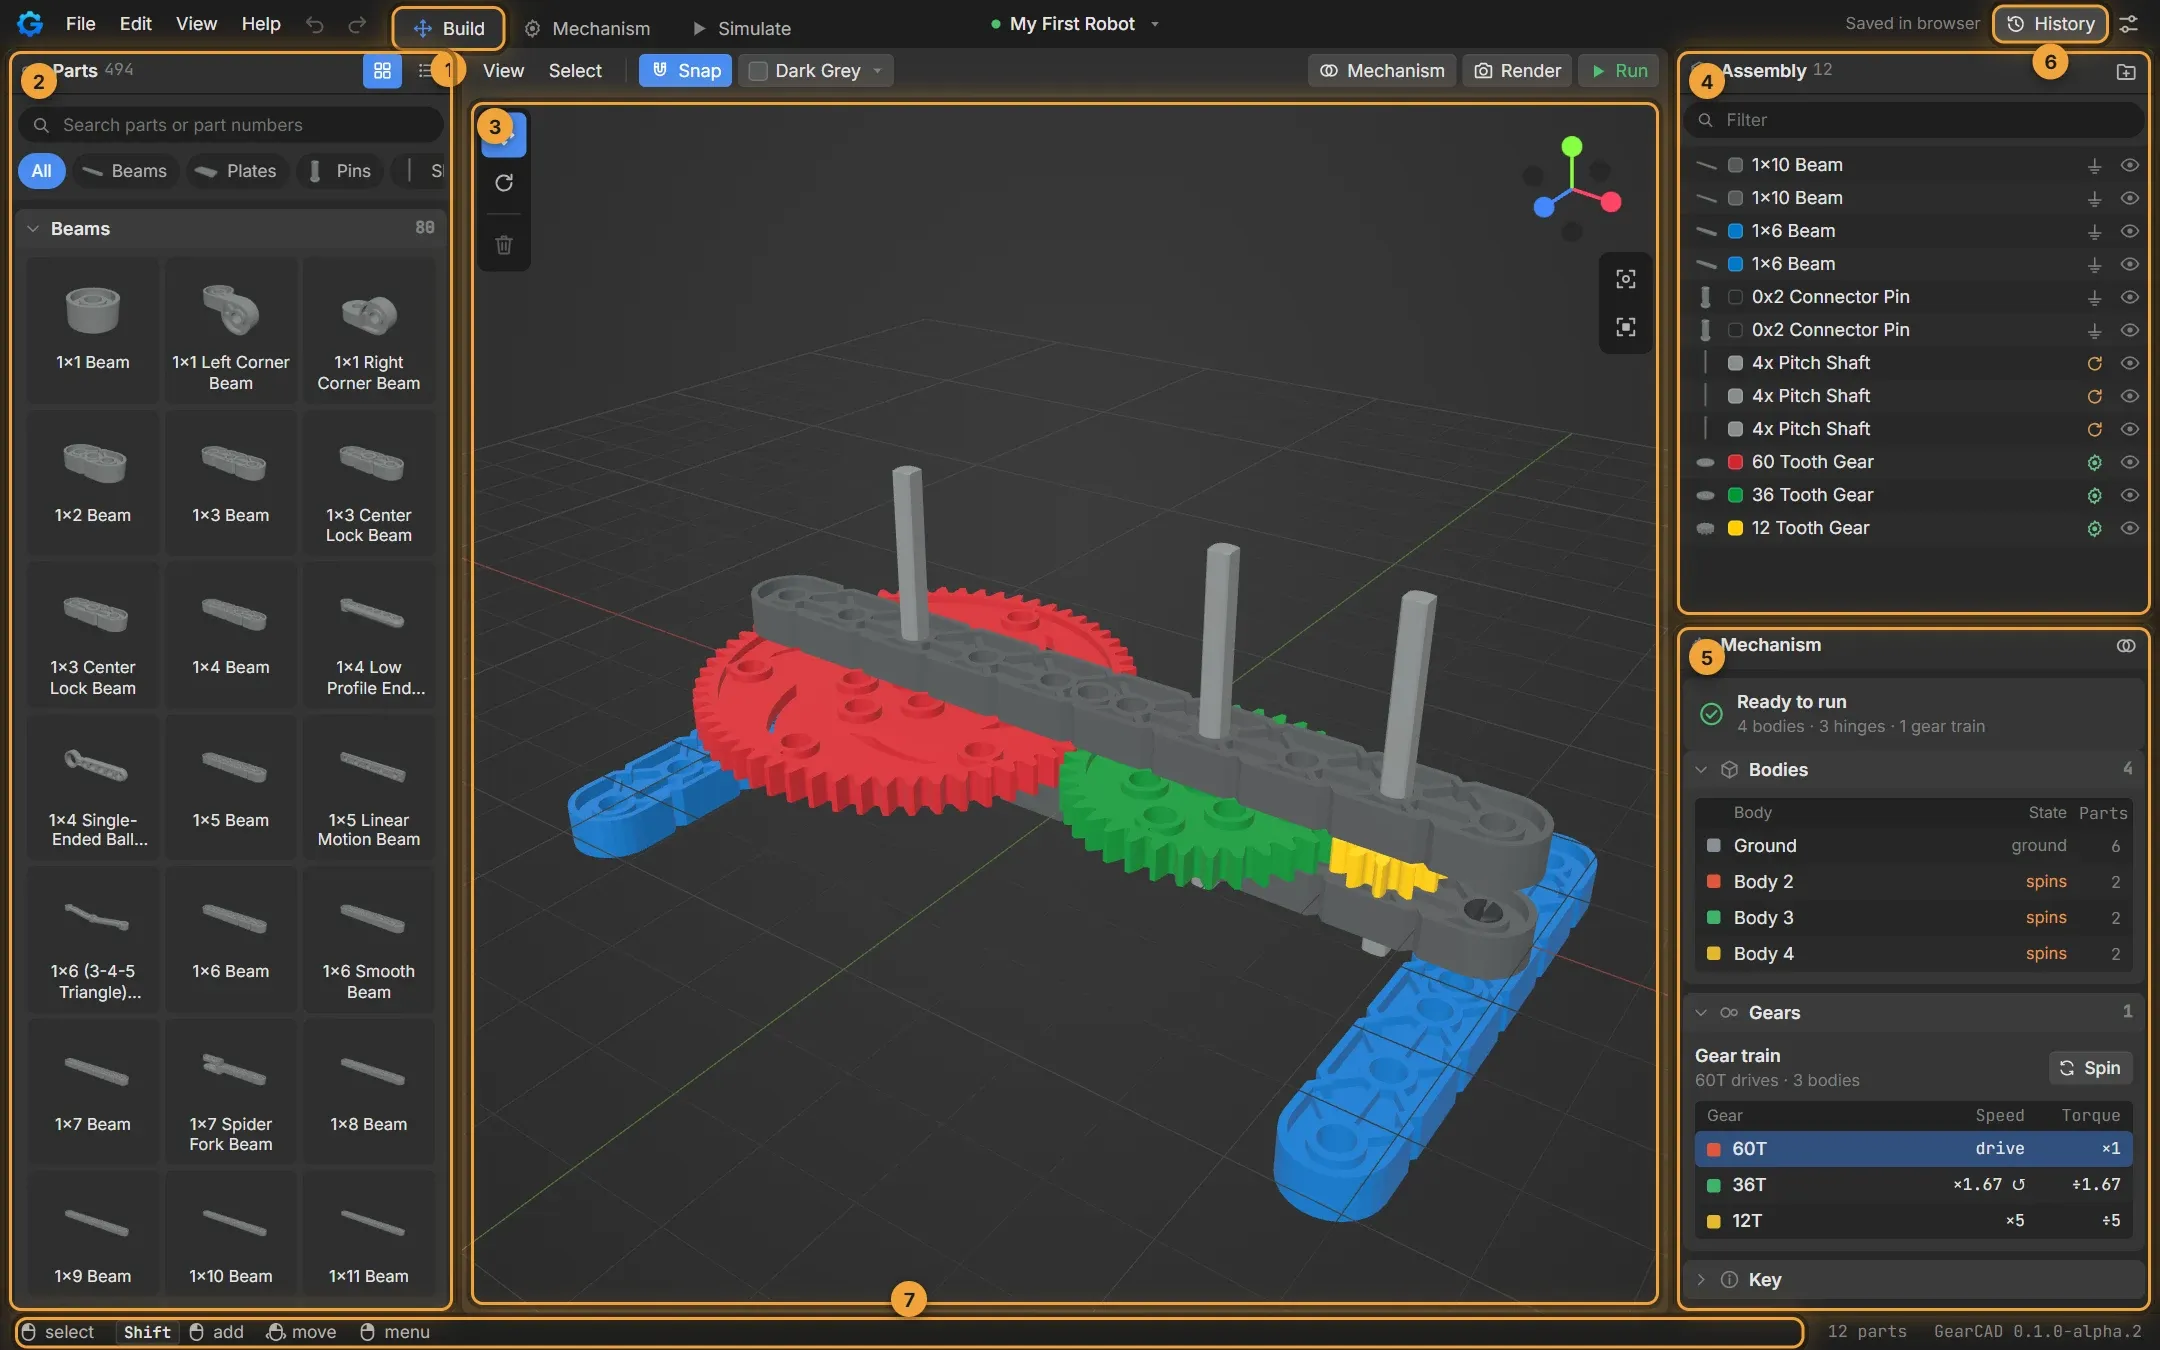
- Workspaces. Build is where you put parts together. Mechanism shows how your design moves. Simulate runs it with physics.
- Parts. Every VEX IQ part. Search for one, or browse by group.
- The 3D view. Your design. The tools on its left are for moving and turning parts; the buttons in the top-right corner frame your view.
- Assembly. A list of every part in your CAD. Click a name to select that part.
- Mechanism. What GearCAD understands about how your design moves, and any problems it found.
- History. Every earlier version of your CAD.
- The status bar. Tells you what the mouse and keys do right now. If you’re not sure what to do next, look here.
4. Look around the model
Section titled “4. Look around the model”With the mouse over the 3D view:
| To | Do this |
|---|---|
| Turn the view around the model | Drag with the left mouse button on empty space |
| Slide the view sideways | Drag with the right mouse button |
| Zoom in and out | Scroll the mouse wheel |
| Look at the whole model | Click Frame everything in the View menu |
If you’re used to another program, you can change what each mouse button does. See Moving around the 3D view.
5. It’s already saved
Section titled “5. It’s already saved”There’s no Save button to remember. GearCAD saves every change a moment after you make it. The top bar shows Saved to file (or Saved in browser) when your work is safe. See Saving and files.
- Adding parts: find a part and put it in your design.
- Moving and turning parts: connect parts together.