

Moving and turning parts
Selecting parts
Section titled “Selecting parts”- Click a part to select it. It gets a yellow outline.
- Shift + click adds another part to the selection (or removes one).
- Ctrl+A selects everything.
- Click empty space to select nothing.
You can also click a part’s name in the Assembly list. That’s handy when a part is hidden behind others.
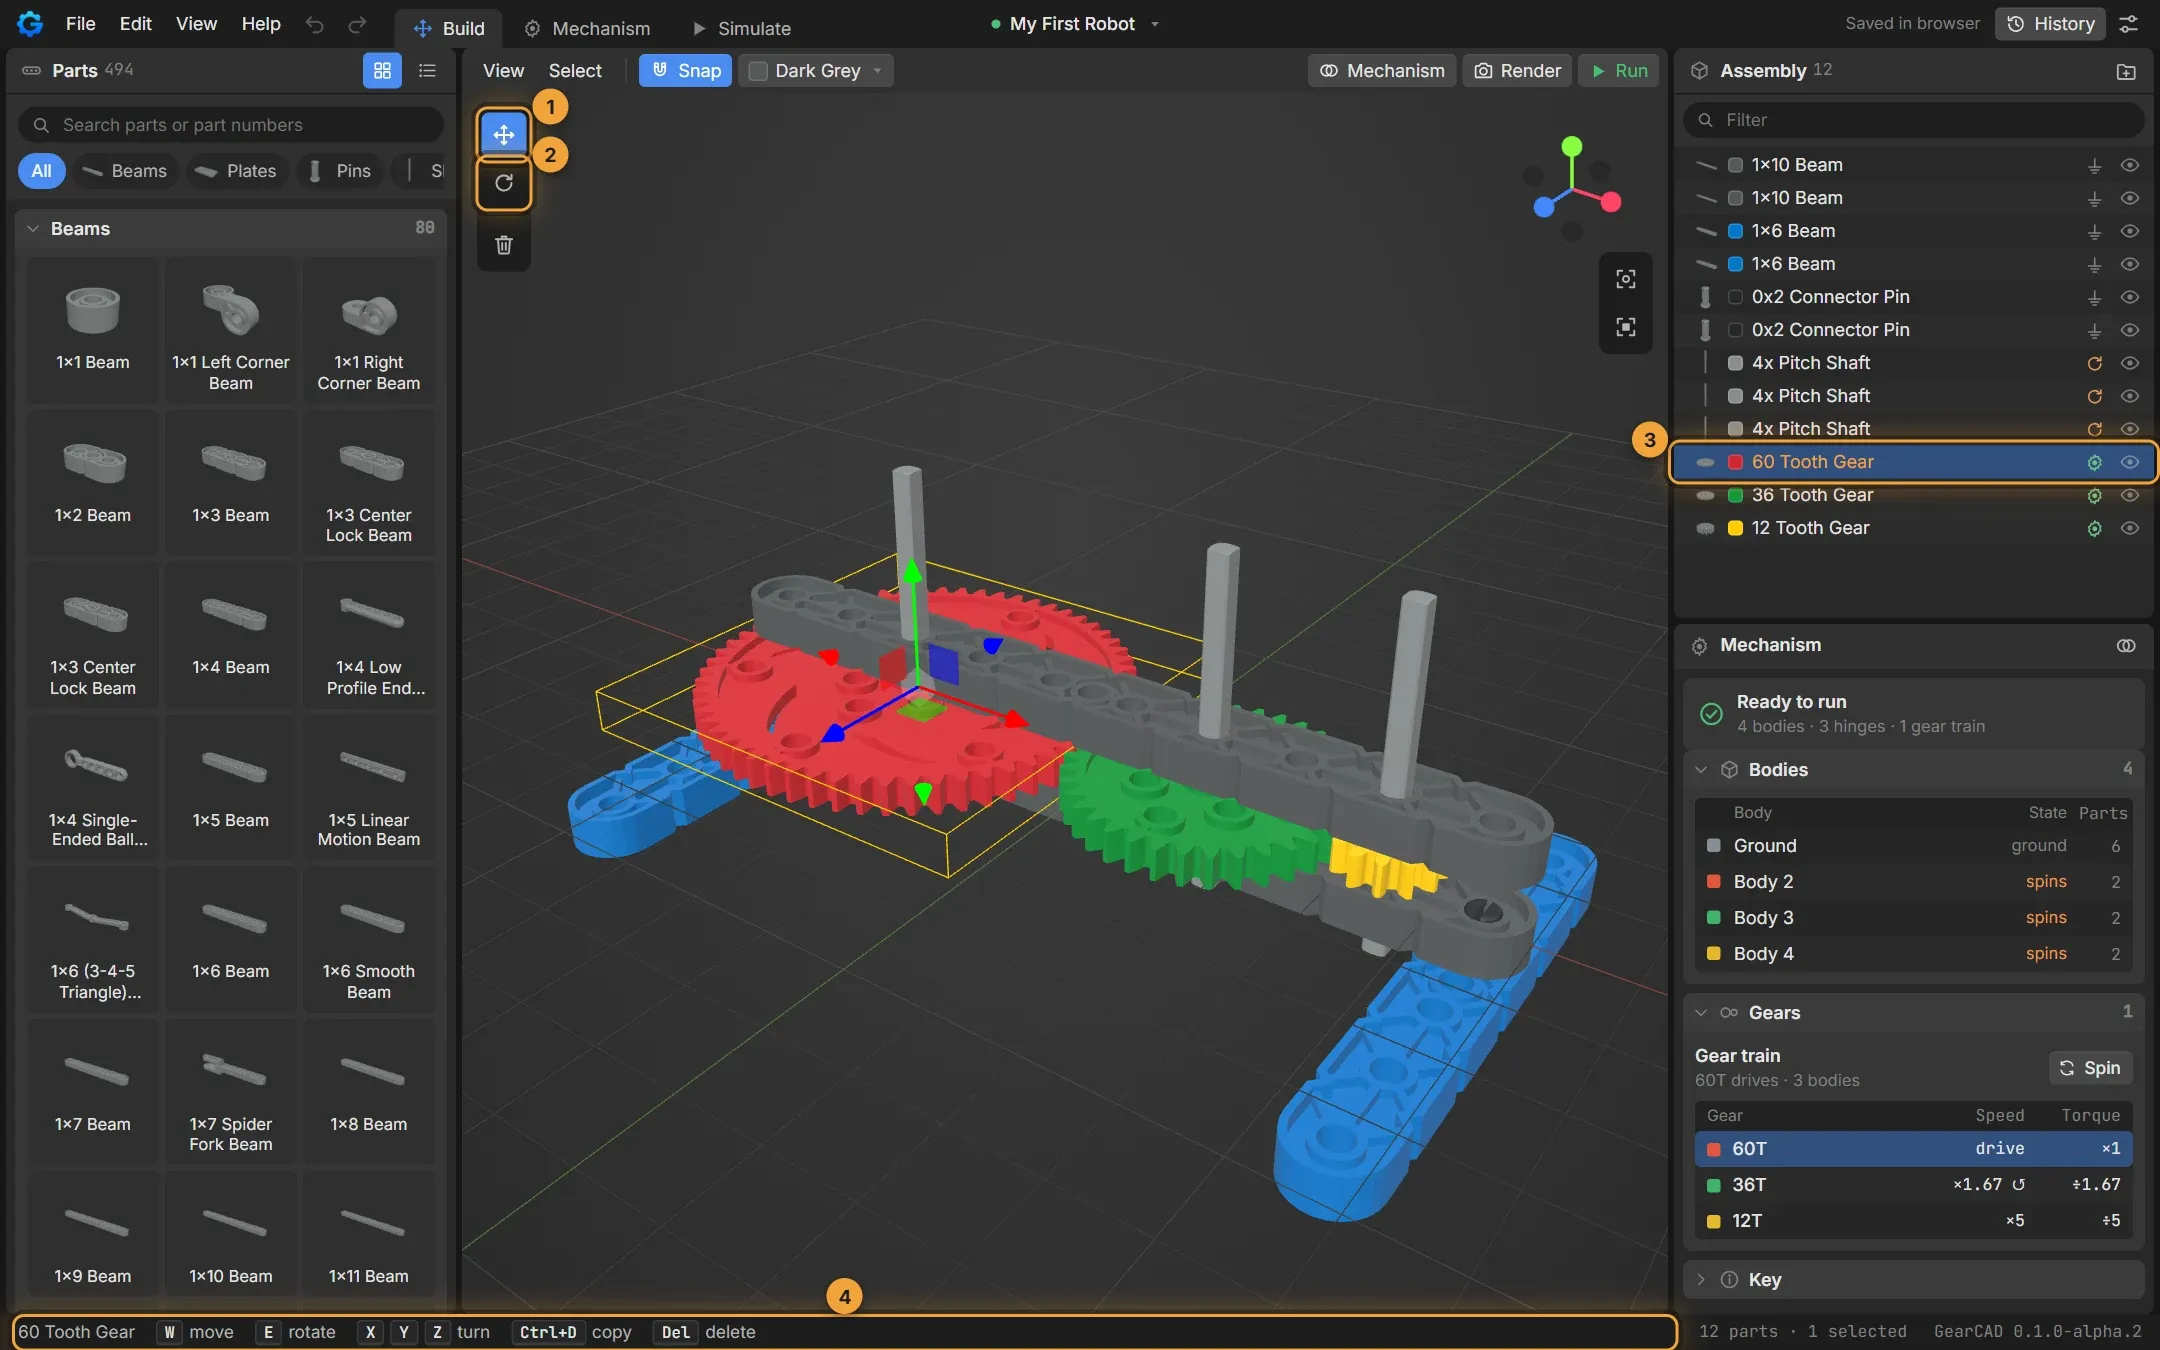
- Move tool (W): arrows for sliding the part.
- Rotate tool (E): rings for turning the part.
- The selected part is highlighted in the Assembly list.
- The status bar lists the keys you can use on the selection.
Moving
Section titled “Moving”Drag a selected part to move it. It snaps to holes, pins and shafts as it goes, the same way as when you add a part.
To move in one direction only, drag one of the coloured arrows. Red, green and blue match the X, Y and Z directions shown in the corner of the 3D view.
Press S (or click Snap above the 3D view) to turn snapping off when you want to place something freely, then press it again to turn it back on. Most of the time you’ll want it on: snapping is what makes parts line up exactly the way they do in the real kit.
Turning
Section titled “Turning”- Press X, Y or Z to turn the selection 90° around that axis. This is the fastest way, and the one you’ll use most.
- For other angles, press E for the rotate tool and drag one of its rings.
Copying and deleting
Section titled “Copying and deleting”| Key | What it does |
|---|---|
| Ctrl+D | Duplicate: makes a copy you can place straight away |
| Del | Delete the selection |
| H | Hide the selection (it’s still there, just out of the way) |
| Ctrl+Z | Undo |
| Ctrl+Y | Redo |
Undo goes back as far as you need, so don’t be afraid to try things.
The right-click menu
Section titled “The right-click menu”Right-click a part for everything you can do with it.
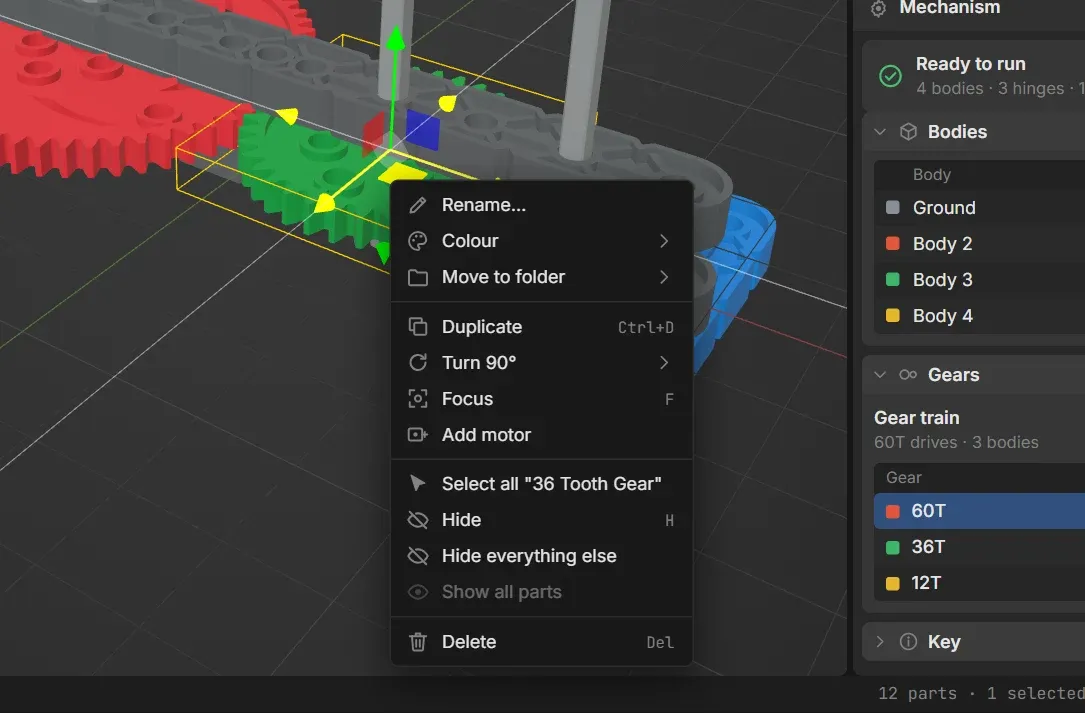
- Rename… gives the part a name of its own, like Left arm motor.
- Colour changes its colour.
- Move to folder puts parts in a folder in the Assembly list, so a big robot stays organised (for example: Drivetrain, Arm, Claw).
- Turn 90° does the same as X, Y and Z.
- Focus zooms the view to the part.
- Add motor makes the part turn by itself in Simulate.
- Select all “…” selects every part of the same kind.
- Hide everything else shows only the selection, for working inside a crowded robot. Show all parts brings everything back.
Colours
Section titled “Colours”VEX IQ parts come in the official kit colours. To change a part’s colour, select it, then pick a colour from the colour button above the 3D view (or from Colour in the right-click menu).
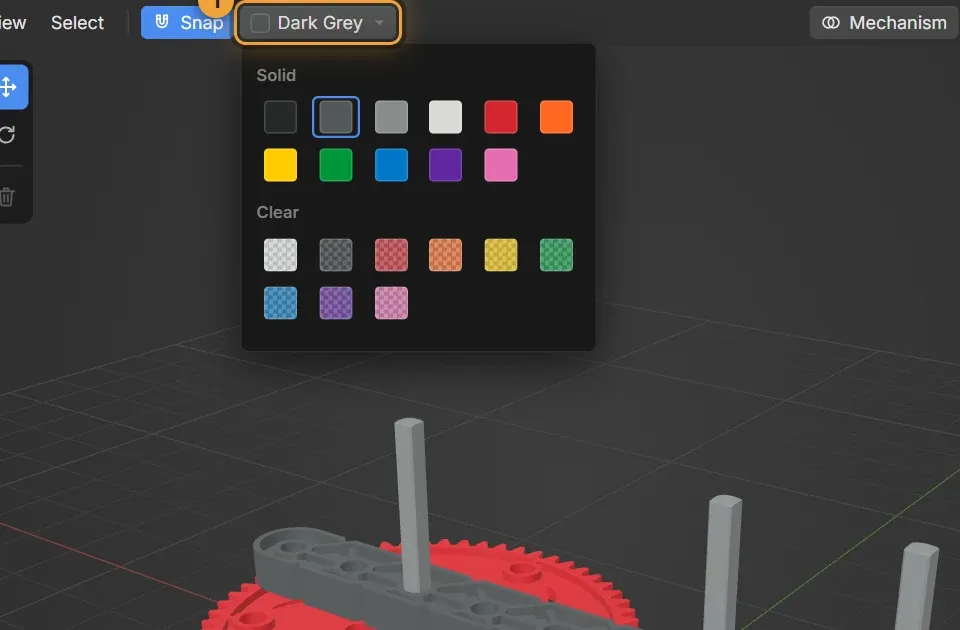
- The colour button. With nothing selected, it sets the colour for the next parts you add.
Some parts only come in one colour, so they keep it: motors, sensors and other electronics keep VEX’s colours, and tires are black rubber.